Tuesday, December 21, 2010
Easy Pastry Braid
Are you looking for a breakfast treat to serve over the holidays? This pastry braid is easy and delicious. It also makes a beautiful presentation, making it special for company. My mom has made this recipe for years, but I don't know where it originated from.
You can use any filling you like. Make your own, or use store-bought pie filling. I came up with this pumpkin filling, because I just can't get enough pumpkin these days. This recipe makes two, so you can make two different flavors if you want.
Pastry Braid (makes two)
Mix:
1/2 cup warm milk
1 package yeast
1 tsp sugar
Set this aside.
In another bowl, mix:
3 egg yolks
1 cup whipping cream
Set this aside.
Stir together in large bowl:
3 1/2 cups all-purpose flour
1/4 cup sugar
1 tsp salt
Cut in 1 stick of butter.
Pumpkin Filling
1 cup canned pumpkin
1 egg
1-2 TBS sugar
2 TBS half and half
1/4 tsp cinnamon
1/8 tsp ginger
pinch of nutmeg
Just whisk it all together. This really only makes enough for one braid; I don't think you could stretch it for two. I made my other one blueberry, which I didn't photograph, because it didn't look as pretty, so we promptly ate it!
Mix wet ingredients together then mix that into flour mixture. Just stir until well blended. Refrigerate dough for one hour. Divide dough into two pieces. Roll each half into a long rectangle about 1/4 inch thick. Important! Do this one at a time and after you roll it out and before filling the dough, place your rectangle on a cookie sheet. I always line it with parchment paper first, but you may be able to just spray it instead.
It's much easier to move your rectangle than to move it after you've filled it; I learned this the hard way. Now, your rectangle is facing you vertically. You want to visually divide it into three sections. You can divide them with a pizza cutter lightly without cutting through, if that helps. Spread your filling of choice down the center. You only need about a cup, by the way. Overfilling is a big mistake! Okay, now take your pizza cutter or knife and cut about six slits on each side. The amount will vary. Now just braid them, overlapping the pieces of dough. Allow the braids to sit about 20 minutes. I forgot to do this once and they still tasted great, but I think it improves the texture to let them raise a bit. Bake on 350 degrees for about 25 minutes, until golden. Let cool, then sprinkle with powdered sugar.
Hope you enjoy this favorite of mine!
Tuesday, December 7, 2010
Cheap-O Christmas Decorating
My husband says I have expensive taste. Maybe that's true. Yep it is true. However, I also love getting something from nothing, being resourceful, and being a good steward. I love decorating my home with things I already have on hand.
I always wanted a way to display my antique cookie cutters in my kitchen for the holidays. A wreath would be perfect I thought, so I went outside and cut a bit off my boxwood. I used floral stems I had in the closet to fashion a wreath shape. Then I reinforced that with floral wire. I wired the boxwood around the shape in small amounts. Then I used a little wire to secure the cutters. It's a little wonky I'll admit, still cute though. I was thinking some red and white bakers twine would be perfect to accent this with.
There was a concern about how long it would last, but it's been hanging in my kitchen window for five days and it still looks pretty fresh. I couldn't get a good picture of it in the window because of the lighting. Hopefully, you get the idea.
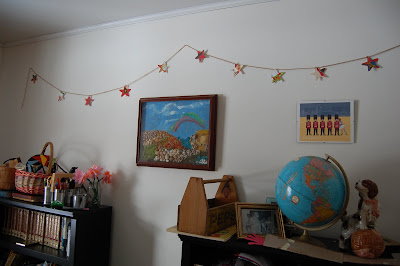
My other cheap project was something I saw several years ago in Better Homes and Gardens. I made this star garland out of old Christmas cards. I always hang onto those, and this is a much better use of them instead of being packed away. I used a star cookie cutter for the template. They are strung onto tweed colored yarn. It's hanging in our little art room. Again, kind of crappy photography. Maybe you'll be inspired to try it anyway.
I love homemade Christmas decorations! What are your favorite ideas for decorating on a budget?
Tuesday, November 30, 2010
Scrappy Banner for Christmas
Tuesday, November 23, 2010
Tips for Hosting a Gingerbread House Decorating Party
For the past few years we've gathered up a handful of friends for a party that's become a very anticipated event. We love our annual gingerbread house decorating party! I thought I'd share some tips for you so you might be inspired to have a little sweet fun for your family and friends.
We keep the guest list small so that we can have the party right here in our home, nice and cozy! Sunday afternoons work really well for us, after everyone's nap.
The Houses
The first year, I had no idea what I was doing, but I was really excited and had big plans. My husband made a template out of cardstock for me, two house shaped pieces, two roof pieces, and two wall pieces. I made six houses from homemade dough. They were beautiful, and the whole house smelled amazing. Would I do this again? Only if I had to make one or two. I can't even tell you how much dough I made. I think I started with a triple recipe and when that didn't make enough houses, I just kept making triple recipes until I got enough houses. It was crazy; I'm talking whole bottles of molasses and jars of cinnamon.
The following year, I just bought the kits. The next couple of years, I found them for two dollars a pop after Christmas. This year, we are making graham cracker houses. The kits are nothing to write home about; they don't taste great (especially if you get them cheap and wait a year to use them, gross), and sometimes they have sort of a cheesy design. So I figured we might as well go the cheaper route. Everyone's bringing a box of graham crackers, and we're planning to get a few of us together early to put them together so they can dry in time to decorate.
Cut squares of cardboard and cover with foil to build the houses on. If you're using a kit, they usually include icing.
The Food
Anyone that knows me knows that parties include food. Every year I've made a couple pots of chili, some bread or salad, and it's self serve. One year I did white chicken chili, and this year I might add a veggie version. Someone usually brings some cheese or tortilla chips, and it's a hit with everyone. For dessert it's always cookies, set out with some adorable napkins. No need for plates or forks!
The Decorating
Every one brings a bag of candy to share. Our favorites are gumdrops and big red gum (for shutters). I make a bunch of icing to stick candy on with. You can buy plastic decorating bags (sometimes the kits include them), or you can just use little ziploc baggies and snip the ends. Put a decorator bag out for each child. I try to have the table ready before guests arrive with bowls for candy. A plastic tablecloth makes clean-up easy, and I usually put a runner of brown paper down the center, because it looks pretty. For the candy, I try to use lots of different sizes of bowls. I love the look of vintage stuff for this; muffin tins work well too. The mini ones are good for tiny candy, like red hots. A box of wet wipes are good to have at the ready. Snacking on candy is encouraged!
This has become a very dear tradition for us. Since we've started this little event, we've added to our families and now have even more little ones to join in on the fun!
Wednesday, November 10, 2010
The Evils of Comparison
As mothers and homemakers, we are very familiar with juggling the balls and wearing the many hats we wear. Sometimes though, something can interrupt that delicate balance. I've had some days like that lately. The interruption for me came when one child was particularly disobedient and the whole day was a turmoil. Then, the following day was a turmoil. I should also add, that this came on the tail end of feeling guilty for things. Things like putting the baby in the play pen to try to get things done, letting my two year old watch Dora for the tenth time, serving another frozen meal. I was just feeling like a bad parent. Sound like a pity party? Yes, but I'm just being honest. Can I just say how incredibly hard it is to school your children with a two year old and a baby in the house? It is so hard. The thing is, I am good at doing the "suck it up and move on" when it comes to the hard things. That works for me. What was so different about this past week, was I spent the whole two terrible days comparing myself to everyone else. And then I realized; the interruption was not my children, it was my attitude.
I am certain that this comparison thing happens all the time with mothers because I've had these conversations before. I started thinking that it was time I got to the bottom of this problem I so often hear talked about. Why do I do this? Is it my pride? Is it selfishness? Discontentment? Is it, possibly, that I want more credit for what I do here?
I don't really know for sure. I do, however know the evils that ensue when I set out to compare myself to everyone else. When I have this attitude, it seems I have less grace for an unruly child. I seem to also be comparing him to Jimmy over there who never argues with his mother. Then again, his mother would never yell! See what I mean? Not a stitch of grace to be found. Comparing myself also completely distracts me from all the beauty there is to be found, even in the imperfect. I also believe that perhaps the most crippling result of this attitude is that it hurts relationships. Specifically, it alienates me from other women. I begin to think that Suzie over there is better than me, so I think I'll avoid her. This is not at all God's design for me, I know.
The reality is that we are all different. This also applies to our children. In a group of very well-behaved children, some are going to be a little more spunky; maybe a little more strong-willed. I have so often stacked my children up to other children; shame on me. The thing is, they are mine and I love them- flawed as they are. Again, my God has shown mercy and grace to me. How can I not show it to my family, myself, and others?
One thing I know, is that I will be trying harder to hold my tongue. I don't need to boast about how productive I am, or how brilliant my children are. My speech should be encouraging, healing, full of grace and truth. That is my goal.
So at the close of quite possibly the longest post ever, if you're still reading, I will say that I would love to hear your thoughts on this matter. It would be a good thing to see this monster coming and have a plan of attack.
Wednesday, November 3, 2010
Hanging On to the Last Bit of Fall
After Halloween, I get so tempted to start playing all my favorite Christmas tunes. I love Christmas! But around here we're really trying to enjoy the last bit of fall before winter sets in.
My front porch is still saying "fall is here" thanks to this tutorial. I used fleece remnants for mine.
I'm thinking a white one would be beautiful for winter.
This favorite has made it's way back to our table. If you need more cooking inspiration, try my other all-time favorites.
Even though we haven't started decking the halls here, I've been thinking about the upcoming holiday for awhile. So, just for fun, I'll give you a peek into a few of the Christmas gifts I'll be working on soon. I've started on this for Jack. I'll be relying on my very talented hubby for these. Maggie will be getting one of these. I made a barn for my oldest last year, and it turned out so cute.
Hope you are enjoying fall in your home!
Thursday, October 7, 2010
Sweet Potato French Toast
French toast is not a new idea, but it took me awhile to really get the hang of it. It was always too soggy, too eggy, or just not flavorful enough. Now that I figured it out, I love it! Also, I found that using good bread makes a big difference. I don't even bother unless I have some french bread lying around. This time I wanted to use up some mashed sweet potato, and the extra flavor and moisture didn't hurt! You could leave out the sweet potato of course.
I use half a loaf of french bread (bonus if it's homemade and a little dry)
Here's what I use to dip the bread slices in:
3 eggs
about 1/4 cup half and half
a big spoonful of mashed sweet potato
1/2 tsp cinnamon
1/2 tsp pure vanilla extract (I've found that imitation just isn't the same)
I find that turning the slices in your egg mixture two or three times is just right.
Fry those slices in lots of butter please! If you have an iron skillet to use, you should.
I'm sure I don't need to tell you to sprinkle with powdered sugar and drizzle with maple syrup.
If your household is anything like mine, you better eat before it's all gone!
Friday, October 1, 2010
The Happy Return
Thursday, September 23, 2010
Some Words About Guilt and Grace
Guilt has been a big pitfall for me as a mother. I see my children having bad attitudes, and it just makes me so angry. And then I recognize that they are using a tone of voice or gesture that I use. It is so discouraging to find that they have picked up my bad attitudes. Then the guilt comes and I feel like I just can't do anything about the problem. Instead of just confessing my sin, I just continually feel guilty and hopeless about the issue.
This was a real eye-opener for me. It's from A Gospel Primer, by Milton Vincent.
As long as I am stricken with the guilt of my sins, I will be captive to them, and will often find myself re-committing the very sins about which I feel most guilty. The Devil is well aware of this fact; he knows that if he can keep me tormented by sin's guilt, he can dominate me with sin's power.
The gospel, however, slays sin at this root point and thereby nullifies sin's power over me. The forgiveness of God, made known to me through the gospel, liberates me from sin's power because it liberates me first from its guilt; and preaching such forgiveness to myself is a practical way of putting the gospel into operation as a nullifier of sin's power in my life.
It's so great to be reminded that as a child of God, I am not captive to sin anymore. I can have victory over sin because of God's forgiveness. How powerful this is in my life as a mother! Letting go of my guilt is so freeing, and allows me to experience God's grace in a very real way.
It's also helpful to remember what my ultimate goal is as wife and mother. My desire should be to further God's kingdom. That's the important stuff, not whether or not I'm becoming a domestic goddess. One of the biggest ways I can teach my children about God is by showing them my need for grace. When I come to them asking for their forgiveness for a harsh word, they can be taught about not only forgiveness, but also their own need for a Savior.
My prayer is that this guilt will no longer be a stumbling block for me, but rather a reminder of God's continual grace in my life.
Wednesday, July 28, 2010
Garden Update
Good news! I planted seeds and against all odds they grew! Nothing ate the seeds, a huge rain didn't come and wash it all away, and not a single deer has touched the plants. My husband built two raised beds and I think next year we may add another. I had to plant some stuff in our flower bed because we had so much.
No, we're not eating solely off our garden or anything, but we have enjoyed lots of lettuce and some peppers, and the squash and tomatoes will soon be ready. The herbs have done really well too.
This has been fun. Granted, if given the choice between gardening or sewing, I'll pick sewing every time. Also, I would rather be baking in an air-conditioned kitchen than swatting at bees in the garden. That said, I'm definitely going to give this a try again next year. I feel like I've really learned a lot.
Oh, those are our chickens. We're hoping to see some eggs soon. That has also been fun. I think my husband has almost succeeded in making me an outdoor girl. Almost. Now he wants to get bees; if that doesn't do it, I don't know what will!
Friday, July 23, 2010
The Family Biscuit Recipe
Here's an easy recipe that my mom and her mom made. When I got married, I copied it into the back of a cookbook I got as a shower gift. These biscuits are great with gravy and a good vehicle for jam. You can also use this as a basic recipe for cheese biscuits or cinnamon-raisin. I'm sure there are lots of great recipes out there for biscuits. However, these are different because, they have three ingredients people. You can't get any easier than that.
Biscuits require a light touch. Too much mixing or kneading and they will be dreadful.
It took me a few tries with these when I was new to cooking to get them right.
Here goes...
2 cups self-rising flour (If you've never used this, it's great for pancakes too.)
1-1 1/4 cups buttermilk (or milk, but buttermilk makes them richer, I think)
1/4 cup vegetable oil
Just mix with a fork until it holds together. Don't overmix. If it looks dry, add a little more buttermilk. If it's too wet, you can knead a little flour into the dough on your counter.
Roll out on floured surface, careful not to roll them too thin. I use a glass to cut them out. Place on nicely oiled pan. I always use a little of the buttermilk left in the measuring cup to rub on the tops.
Bake at 450 degrees in the center of your oven until golden brown. Times will vary based on how thick you cut them.
Notice the little tiny biscuit. My mom always baked the bit of dough that was left after rolling out the biscuits. When I was little we called that the "baby biscuit". I always got it because I was the youngest. Funny how you carry on silly traditions like that.
This recipe can easily be doubled, or tripled. Enjoy!
Monday, June 21, 2010
My So-Called Food Snobbery Explained
I've mentioned before that my husband thinks I'm a food snob. There's been a running joke here lately about his comment to me that it's okay if I make "regular food". So am I a food snob? Here's the deal. My mother was and is an excellent cook. If she didn't get my lunch packed before school, she would bring me something homemade at lunchtime. I was the envy of all my friends. When I got home from school, many times there were pepperoni rolls or cookies waiting. She made most everything from scratch and that made a huge impact on me. When I got married I was disturbed to find out that my husband would really secretly rather have the brightly colored macaroni and cheese from a box than mine. The nerve. We dated four years before we got married and I never knew this.
He has since come around to my way of thinking. Although last year I made a pizza with goat cheese on it and he said it tasted like armpit. Honestly though, I wasn't crazy about the goat cheese either. Mozzarella is just fine, but (here's where the snobbery comes in) fresh mozzarella is just much better. I asked him the other day if he wanted anything at the store and he asked for graham crackers and the "crappy" peanut butter, he so affectionately calls it. "Crappy" means the unnatural kind. Hey, I wouldn't change him a bit. Being different is what keeps things interesting.
So, yeah, I have some smug tendencies toward food. It can get you into trouble. A while back at our Bible study, I nearly caused my friend JenaRae's throat to close up when I brought tea that appeared to be simply tea but it was tea with chai. "Shoot, I forgot you were allergic to cinnamon!" Sorry Jena!
Lest you never want to have me over for dinner, let me just say the following: I do enjoy the perks of a cake mix. Velveeta (if you want to make queso late at night after the kids are in bed) is valuable. I make beans and cornbread; sometimes we have pancakes for dinner. Sometimes it's more important who you're cooking for than what is actually on the table. Okay, it's always more important who you're cooking for. I genuinely appreciate any and every effort in the kitchen, especially when done out of love for your family. So keep it up ladies (or gents), whatever your style of cooking may be! You will not be judged.
Happy Cooking!
Saturday, May 8, 2010
Cooking Party for Jack
I can't believe that my oldest son is 5 years old now. He is such a delight, joyful and sweet. He has always loved to help me in the kitchen and while it may not be so convenient, I usually find him a little job to do while I'm cooking. It was for that reason we had a cooking party for him. We kept the guest list small and had the party at my mom's restaurant. Each child got to make their own pizza! I laid out a few yummy ingredients for topping the pizzas and my mom made delicious dough. We rolled out a small round of dough and placed each one on parchment paper where we wrote each child's name. After the kids were done decorating their pizzas the whole thing, parchment paper and all, went into the big commercial ovens to bake. Having the party at a restaurant made the whole thing very easy!
We had lots of mommies to oversee the fun. My friends are great to fill in the gaps of what I may have forgotten; one friend brought out some bottles of hand sanitizer during the pizza making.
While the pizzas were baking, the kids made their own fruit kabobs. Be warned that you're dealing with sharp sticks here. Little brothers and sisters did not join in on this and we had lots of moms to help out!
After everyone finished, the kids decorated cupcakes. For favors, I made some really easy aprons which were worn during the festivities. I just bought a big bag of white hand towels from Sam's, folded over the corners on the top and seamed down to make a slot for a ribbon. The ribbon goes around the child's neck then ties behind their back. Super easy and cheap! A week before the party I asked the moms of the party guests for favorite recipes of their kids. My husband printed up little cookbooks for all the kids to take home. This was a big hit! I found lots of ideas here and here.
It was a good time! My big 5 year old enjoyed it and so did I!
Monday, May 3, 2010
The Birthday Gift and My Last Chance
Just wanted to share what my husband made me for my birthday. It's called a cold frame. You start your seeds in small containers and keep them in here while it's still cold outside.
It did it's job well. All the little plants look great and were planted in their permanent spot in the garden this weekend. Gardening has never been my domestic strong point, but I'm giving it another shot! I was a little surprised that he made this for me, knowing I have a reputation for stinking at gardening. He told me this weekend that if the garden didn't do well, that was it-this was our last chance. Shoot. The pressure's on. I'm not prepared for this to work this time. I haven't done enough research. I don't know which plants need full sun. But, if I see any critters out there eating the plants, I'm going to sit in a tree with a BB gun.
Monday, March 29, 2010
Super Easy Craft for Your Little Reader
I came across this awhile back in an issue of Highlights. I thought it was a great way to show Isabelle's progress in reading. She has a big stack of second grade chapter books to go through and this lets her see how far she's come.
It's a bookworm! I wrote the titles of her finished books on the circles before gluing. She helped cut out the circles and added the legs and smiley. Isn't he cute? We left lots of space for more circles to add as she finishes more books.
Now if we can just find a project to help encourage her progress in math...
Thursday, March 25, 2010
Monday, March 15, 2010
Birthdays
This is birthday month in our house. I turned the big 3-0 on Friday and my husband and son also have birthdays this weekend. Once that's over, my little girl will be next in April. Which means lots and lots of cake. I was just beginning to make some progress getting back into shape after baby then the holidays. I cannot resist the cake, especially when it is my mom's. My husband surprised me Friday with a little party. It was a special evening that took place here.
This dear friend gave me all I needed to sew a bag from a great book, Handmade Home. I tried everything possible to link to the book, but had no success. Normally I would blame that on my computer, but it's probably my fault. Just google it, it's great. I had been wanting to make it but had been putting it off. Gina cut everything for me so all I had to do was sew. She's a gem, I tell 'ya. Here's the finished product. Looks great, I think.
Hubby's making me a special gift that is nearly complete. It's pretty impressive. Hopefully some pics will come soon. It's a good opportunity to brag on him a bit.
More birthday fun coming!
Thursday, February 11, 2010
Fabric Hearts Garland
I love Valentines Day. The colors, flowers, romance and just the plain fun of it! It is when I make up for all the baking I didn't get done at Christmas. Nothing tastes better than a heart shaped cookie with sprinkles.
We've been doing lots of crafting around here and this is a project I've been thinking about for awhile. We've seen this kind of thing for birthdays and Christmas, this one is just for Valentine's Day. I'll probably hang it in my girls' room after the day has passed.
This is very simple, just sewing wrong sides together and then doing a top-stitch.
A few tips:
I drew a heart on paper and traced it onto the wrong side of fabric. It's very simple to sew if you stitch right on the line. Don't forget to leave a little space to turn it right side out.
When you reach the points in the heart, stop with your needle down and then pivot. It makes for a nice heart shape.
Trim around the heart, leaving about 1/4 inch. Go back and trim a little more in the top inner corner and make a little notch right in the top point and then make little notches around the curves. This keeps the fabric from pulling after you turn it right side out.
Iron it smooth, pressing down your opening. Then do a little top-stitch.
I used one package of extra wide double fold bias tape binding to join all the hearts. I was thinking it might be nice to put a felt layer in between, but I didn't want to do an extra step.
This was pretty quick and easy and just looks adorable across the kitchen window.
Subscribe to:
Posts (Atom)