Showing posts with label cooking. Show all posts

Friday, February 10, 2012

Dessert for Breakfast


Today we had dessert for breakfast.

This past week we had everyone's (mostly) favorites every day. We had muffins one day, overnight steel-cut oats one day, scrambled eggs on toast with cream cheese once. We even had cereal one day, which we never do. I am not above cereal, but I have four kids, and they never just want one bowl, which means the box lasts about a day and a half. And the fact is that I don't like eating it for breakfast.

Today, I made this awesome cobbler. I wanted something easy that could bake up while we were doing chores. I think that because this recipe has so little sugar and butter, you can make it work for breakfast. Besides, a muffin is essentially dessert, and everyone eats those without reserve.

I made myself feel like a better mother by serving it with yogurt pooled beside it. Using a lot of blackberries (around three or four cups, I think, I didn't measure!), and adding a crumble made with a bit of oat flour, oats, brown sugar, and butter made it feel a little more breakfast-y.

Please don't burst my bubble by telling me about the evils of white flour and refined sugar, okay? It was delicious, it was Friday, and I've been a good girl lately.

Speaking of breakfast, I am excited to try this one. I am always looking for something new to try for our mornings.

Tomorrow we are having these cinnamon rolls. I like to mix them, roll them out, then put them in the fridge until morning. Usually on Saturdays I make my husband the manly food he wants, like biscuits and gravy, but I have been wanting to have these for awhile. Cinnamon rolls will be a cozy breakfast for tomorrow; I think we are going to have more snow tonight!

Have a lovely weekend!

Friday, October 21, 2011

Cream Cheese Pastry with Crumbly Topping


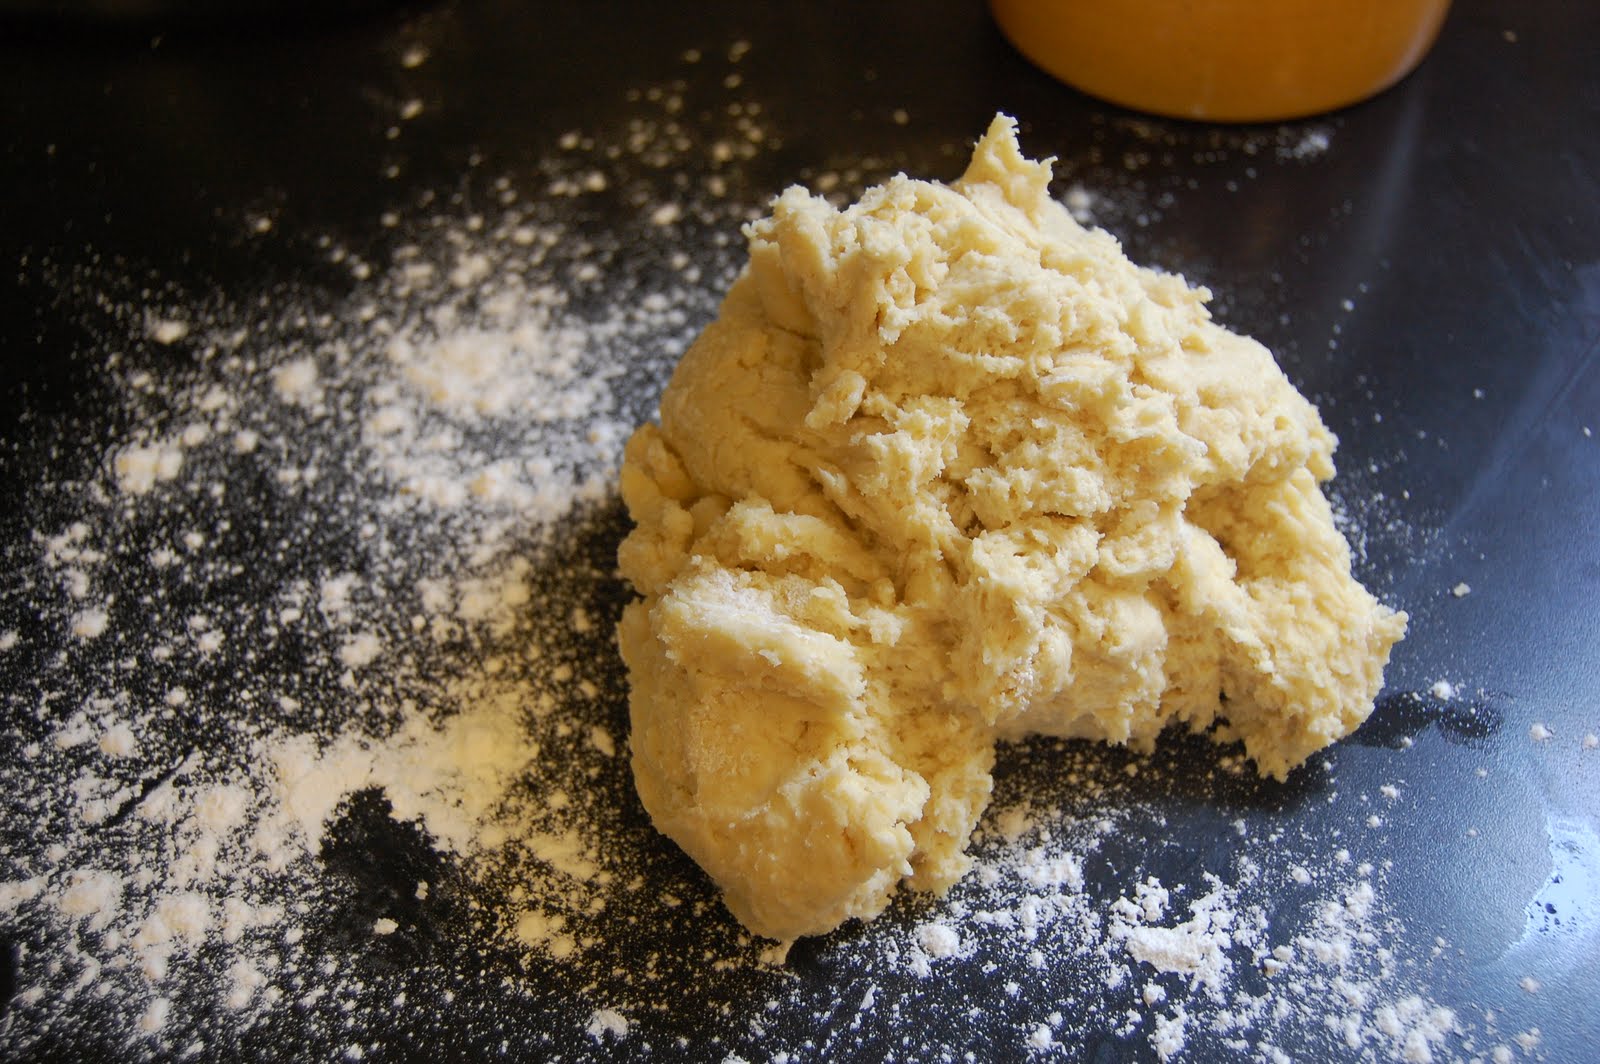
If you are looking for something healthy to cook, move right along. This recipe is not for you. It is, however, so very delicious. It is another winner that my mom cooked up, years ago. Remember the Easy Pastry Braid? The same dough is used to make this recipe, and it is easy! This dough is so easy to work with, and always turns out right.

Ready? Here goes...


Make your dough, and refrigerate for an hour. I have even mixed it up before bed and left it to refrigerate until morning. I'm telling you, I have never had any trouble with this dough recipe.


Spray a 11 x 9 pan with cooking spray and set aside. Then pinch off about 1/3 of your dough and set that portion aside. With the rest of your dough, roll it into a rough rectangle and place in the pan. Then just press it around until you fill the pan. Press the dough up the edges of the pan as well. Now you have a place to pour your filling.

Mix your filling! In a mixing bowl, beat eight ounces cream cheese, one egg, and 1/4 cup sugar until smooth. Pour this on top of your dough. Set that aside.

Now, take that bit of dough we pinched off, and roll it into a smallish rectangle. Cut strips of dough out, and lay them on top of your filling. We are going for a rustic look here, it doesn't need to be fancy. Every one will be too busy eating it to care what it looks like anyway! Now set that aside in a warm place to rest while you make the topping.


For the topping, mix one cup flour, one cup sugar, and one stick of butter with a pastry blender. I usually start out with a pastry blender and finish with my fingers. You can just use a fork if you don't have a pastry blender. Just mix it all up till it's crumbly. Make sure you leave some big pieces. Dump that deliciousness on top of your pastry!


Bake at 350 degrees for about 20 minutes, or until it's golden brown.


I think you are going to love this one!

Tuesday, August 9, 2011

Making Jam


This morning I came across this recipe, and I am going to try it as soon as I find a good deal on plums. I love making homemade jam. There's something about those sparkly jars in my cabinet filled with something I made. I made my first batch of jam last year using blackberries from our yard. Since then I've made peach, strawberry, and blueberry. The more I have done it the more confident I have become. Making jam isn't nearly as intimidating to me as canning other things, because you use the water bath method. You can buy special equipment for this, but I just use my stockpot with a rag on the bottom instead of a rack. Besides your jars and lids, the only other equipment you need is a utensil set. This is the one I have.

This site is where I started reading up on canning, and it had lots of helpful tips. I read and re-read about making jam before making my first batch, and then I just followed the directions on the pectin package. I've used Sure-Jell for less sugar recipes, and this one. These allow you to make jam with a lot less sugar, or even with honey.

I hope these links and tips will be helpful if you've never tried making jam before. It really is so much fun, and sweet little jars of jam make great gifts!

Friday, July 29, 2011

Watermelon Slushies


I always find us out of fun drinks on days when the kids are out in the sun, not a good thing. We have had some dreadfully hot days here lately, and I needed a cold drink for my four little ones. So I made slushies! It is amazing what a blender can do.


This is really a non-recipe, and this whole post is serving to fill in the gap until I have something brilliant to share, if I'm being honest. Maybe this will just spark some creativity in the kitchen? I felt this drink wasn't really sweet enough for my grown-up taste, but my kids loved it. My daughter asked me if I made this up myself, and when I answered yes, she seemed impressed. So I guess you can't go wrong if something you try in the kitchen charms your kids.


I simply blended about two cups chopped watermelon, a cup of ice, about a 1/4 cup apple juice, and the juice of two lemons. I tasted and added until I got the consistency I wanted. Sorry about the lack of concrete measurements; told you it was a non-recipe.

I really think some limeade in place of the apple juice might make this fabulous. And I'm certain some really sweet lemonade would do the trick. So you try it and tell me what you come up with, and I will just benefit from your creativity! How's that?

Monday, July 25, 2011

Why am I blogging about rice krispie treats?

Because these were just so good. Boasting browned butter (a lot of it) and coarse salt, these are not your grandma's rice krispie treats! I don't have a picture to show you because we ate them all up at Bible study the other night, and I've been a pretty lazy blogger lately. I doubled the recipe and put them in a 11x13 dish, and got lovely towering treats.

I've been labeled a food snob, and these treats are definitely food snobbery at it's best. For me, food snobbery is about taking simple ingredients and pairing them with something unexpected. It's not about fussy, hard to find ingredients or difficult cooking methods.

Hopefully soon I will be back to regular blogging. We are just really trying to pack in plenty of summer fun in between laundry/cooking/naps while we still can! Hope you are enjoying your summer.

Tuesday, May 31, 2011

Maggie's Tea Party


My little Maggie is a lover of beauty. She can find beauty in most anything, and gushes over the simplest things, saying "that's so pretty" or "that's so nice". So for her birthday party, the emphasis was on beauty. She wanted a dress-up party, so I set out a stack of fancy hats and a box of dress-ups.
On the menu was raspberry tea, lemonade, and an assortment of treats, including popcorn and pretzels. I made lemon bars, and this recipe was fantastic. So, so good. For the birthday cake, I made cake cones and used twinkie filling for the icing.

I made paper pom-poms; fun, easy, and they were so pretty.


Everything turned out lovely, and Maggie was pleased.

Wednesday, April 6, 2011

Some Random Things in a Hurry

Sorry for the delay in posts. My husband had my computer at his office working on it, and we were in the midst of our birthday marathon around here. When things settle down, I hope to post some of our birthday party stuff, and part two of Girls' Room Before and Afters.

In the meantime, I thought I'd post some links of projects and finds along with an overview of what's going on around here. Sound good?

This project is super cute! I think peeps are fun, but I'd honestly rather look at them than eat them! I don't know if I'll get to this or not, but someone should.

I found these reusable straws some time ago, and finally decided to purchase some. We love them! We go through straws so quickly that I think they are worth the investment for us. I did wait for a sale however, because they are pricey.

We also added to our hens recently. Twenty-seven of various breeds ordered from here. We have loved raising chickens; it is really so easy, and having our own eggs has been great. Raising pets has never been our strong point, but we have had great success with chickens. My husband and I talked for years about getting chickens. I can't even remember when we started talking about it, maybe even before we were married. We always thought it would be a good opportunity to teach responsibility to our kids, and it certainly has. Our two oldest, ages eight and six, are able to gather eggs, feed and water the birds, and even clean out the coop.

Speaking of eggs, I made this for my husband and I for dinner one night after the kids went to bed. We occasionally wait to eat dinner together alone after bedtime. I make something easy and fun for the kids, like pancakes and chocolate milk, and then we can have a relaxing dinner alone. We loved this meal, and it's definitely something that I'll make again. So, so good.

And please...this is so super fun. We love Starbucks. There is one located about five minutes from our house, and we frequent there. Awhile ago, when we pulled up at the drive-through (all six of us), the guy knew our order. It was funny and frightening at the same time.

Okay, there you go. Just needed to clear the cobwebs off of this space! Have a good rest of the week!

Tuesday, March 1, 2011

Plum Crisp: Y.U.M.M.Y


I've never been a big fan of plums, but when I saw them for fifty cents a pound back in the fall, I wondered if they would make a good crisp. I mean, come on, if you sprinkle something with sugar and roast it, it's bound to taste better right? Right!
I can't believe this fruit I've passed up for years is so good baked into a crisp. I made this a couple times in the fall, and then I couldn't find anymore plums. Last week I found them for fifty cents again, and I wasted no time in bringing them home to be cooked into crisp-y goodness.
You could use your favorite apple crisp recipe to make this, if you have one. For years I tried to follow apple crisp recipes, but I was always changing and adding to get the results I wanted. The topping part was never oat-y enough for me, or it was always too greasy. Also, there was never the right crisp to fruit ratio for me. (I get that I'm picky.) I also don't like to kill fruit with sugar, so I always go easy on the sugar in desserts like this.
Try my topping recipe on plums, or use your own! I just wanted people to know that plums rock in a crisp. And maybe someone has already discovered this...


Plum Crisp

7-8 plums
Slice into wedges, kind of thin, so they will bake quickly. I got about 8 wedges per plum.
Sprinkle with about 2 TBS sugar, toss together and put into a casserole dish.


1/4 cup flour
1 1/2 cup oats
1/2 cup brown sugar
1/2 tsp cinnamon
1/4 cup butter
Stir together the first four ingredients, then cut in your butter.
Spoon over your sugared plums, and bake on 375 degrees for about 30 minutes, or until golden and your fruit is tender.

I know you'll want to top this with whipped cream, or vanilla ice cream.


Swoon.

Wednesday, February 23, 2011

Twinkie Cakes!


My mom used to make us these yummy little cakes that we called twinkie cakes. They tasted just like a twinkie, only better. The secret is in the filling, which I'm going to share with you. When I started making them for my kids, I began rolling them in sparkly sugar and calling them fairy cakes. Whatever you call them, these are really good and really simple. I made them for Valentine's Day this year, and colored the icing pink.
Just use your favorite yellow cake recipe, or yellow cake mix. I really like a cake mix for a treat like this, because it lets you get to the fun (and delicious) stuff faster. This time I used a yellow cake recipe from my old faithful Good Housekeeping cookbook, but I've used a cake mix many times as well.


Twinkie Cakes (aka Fairy Cakes)

1 recipe yellow cake made into cupcakes, but don't use liners! At the end, you're going to cut them open, so you want to keep the sides intact. Just give the muffin tin a spray with cooking spray.

Twinkie Filling

Combine 1 cup milk and 1/3 cup all-purpose flour in a small saucepan. Cook over medium heat, stirring just about constantly until it makes a thick paste. It's going to get thick really quickly, so just stir until it thickens then remove from heat. Now let it cool just a bit, then pop the pan into the fridge to chill.

After the paste is nice and cool, it's time to finish making the filling. Now beat 1 stick of butter and 1/2 cup crisco together in your mixer for 4 minutes.

Then, add 1 cup confectioner's sugar and 1 tsp vanilla and beat another 4 minutes.

THEN add your chilled paste, and yes, beat yet another 4 minutes. It's going to pay off, I promise you.

It's okay to have little bitty chunks in the filling, they will be few and far between.

All right, now just halve your little cakies and fill them up. Around here, we like things sparkly, so if you are so inclined, roll the edges carefully in some chunky sugar or sprinkles.

You can also use this filling to fill and ice whole cakes. It goes really well with a rich chocolate cake. In fact, the filling recipe will probably make more than you'll need for the cupcakes, so why not make that cake too, and then invite me over to help you eat it!

Thursday, January 6, 2011

Applesauce Spice Cake with Browned Butter Frosting


Hello again. It seems I've been too busy celebrating, cleaning up from said celebrating and being sick to keep up with this space. I was just remarking on the phone to a friend the other day that my family had escaped the stomach bug that I kept hearing about. I was sick all that night.
Better now and hopefully ready to get back into the swing of things. Soon I hope to post a few pictures of the gifts I made for my family, but right now I have a favorite recipe I want to share. I spent all yesterday afternoon making desserts for our Bible study last night, and then we didn't get to go. Not disappointed that we have to eat this cake all by ourselves. I love this recipe! The original recipe says to dust with confectioners sugar, but I love it with browned butter frosting, something I discovered a couple years back. Either way this cake is delicious.

Applesauce Spice Cake (adapted from Better Homes and Gardens)

You'll need:
2 cups all-purpose flour
1 1/2 tsp cinnamon
1 tsp baking powder
1/2 tsp baking soda
1/2 tsp ground ginger
1/4 tsp nutmeg
1/2 tsp salt
1/2 cup butter, softened
1/4 cup granulated sugar
1 cup packed brown sugar
2 large eggs
1 1/4 cups unsweetened applesauce

Grease and flour your pan. I use one 9-inch round cake pan for this.
Combine dry ingredients and set aside. In your mixer, beat butter and sugars until blended. Add eggs, one at a time, and beat well. Reduce speed to low and add applesauce. Don't be afraid at how the mixture looks; it's supposed to look curdled. Beat in your flour mixture until good and smooth.
Scrape into pan and spread evenly, then bake in a preheated 350 degree oven for about 40 minutes.
I have doubled this recipe and used two round pans to make a beautiful layer cake, as you'll see in the photo at the bottom. That was my daughter's 8th birthday cake.
Now for the frosting. I'm not big on frosting, but this stuff is amazing. Really. Try it on pumpkin cookies.


Browned Butter Frosting
1/2 cup butter (I like unsalted)
4 cups confectioners sugar
4 TBS milk (maybe a little more)
1 1/2 tsp vanilla extract

Easy: cook your butter over medium heat until it starts to brown, stirring occasionally. There will be little flecks of dark brown in the bottom of your pan. I even let it get really dark this time, still delicious. Let it cool, then beat together with the rest of the ingredients. Add milk and beat until it's a good consistency for spreading.


Now, snuggle up with a hot drink and enjoy!

Tuesday, December 21, 2010

Easy Pastry Braid


Are you looking for a breakfast treat to serve over the holidays? This pastry braid is easy and delicious. It also makes a beautiful presentation, making it special for company. My mom has made this recipe for years, but I don't know where it originated from.
You can use any filling you like. Make your own, or use store-bought pie filling. I came up with this pumpkin filling, because I just can't get enough pumpkin these days. This recipe makes two, so you can make two different flavors if you want.

Pastry Braid (makes two)
Mix:
1/2 cup warm milk
1 package yeast
1 tsp sugar
Set this aside.

In another bowl, mix:
3 egg yolks
1 cup whipping cream
Set this aside.

Stir together in large bowl:
3 1/2 cups all-purpose flour
1/4 cup sugar
1 tsp salt
Cut in 1 stick of butter.

Pumpkin Filling
1 cup canned pumpkin
1 egg
1-2 TBS sugar
2 TBS half and half
1/4 tsp cinnamon
1/8 tsp ginger
pinch of nutmeg
Just whisk it all together. This really only makes enough for one braid; I don't think you could stretch it for two. I made my other one blueberry, which I didn't photograph, because it didn't look as pretty, so we promptly ate it!

Mix wet ingredients together then mix that into flour mixture. Just stir until well blended. Refrigerate dough for one hour. Divide dough into two pieces. Roll each half into a long rectangle about 1/4 inch thick. Important! Do this one at a time and after you roll it out and before filling the dough, place your rectangle on a cookie sheet. I always line it with parchment paper first, but you may be able to just spray it instead.


It's much easier to move your rectangle than to move it after you've filled it; I learned this the hard way. Now, your rectangle is facing you vertically. You want to visually divide it into three sections. You can divide them with a pizza cutter lightly without cutting through, if that helps. Spread your filling of choice down the center. You only need about a cup, by the way. Overfilling is a big mistake! Okay, now take your pizza cutter or knife and cut about six slits on each side. The amount will vary. Now just braid them, overlapping the pieces of dough. Allow the braids to sit about 20 minutes. I forgot to do this once and they still tasted great, but I think it improves the texture to let them raise a bit. Bake on 350 degrees for about 25 minutes, until golden. Let cool, then sprinkle with powdered sugar.
Hope you enjoy this favorite of mine!

Wednesday, November 3, 2010

Hanging On to the Last Bit of Fall


After Halloween, I get so tempted to start playing all my favorite Christmas tunes. I love Christmas! But around here we're really trying to enjoy the last bit of fall before winter sets in.
My front porch is still saying "fall is here" thanks to this tutorial. I used fleece remnants for mine.


I'm thinking a white one would be beautiful for winter.

This favorite has made it's way back to our table. If you need more cooking inspiration, try my other all-time favorites.

Even though we haven't started decking the halls here, I've been thinking about the upcoming holiday for awhile. So, just for fun, I'll give you a peek into a few of the Christmas gifts I'll be working on soon. I've started on this for Jack. I'll be relying on my very talented hubby for these. Maggie will be getting one of these. I made a barn for my oldest last year, and it turned out so cute.


Hope you are enjoying fall in your home!

Thursday, October 7, 2010

Sweet Potato French Toast


French toast is not a new idea, but it took me awhile to really get the hang of it. It was always too soggy, too eggy, or just not flavorful enough. Now that I figured it out, I love it! Also, I found that using good bread makes a big difference. I don't even bother unless I have some french bread lying around. This time I wanted to use up some mashed sweet potato, and the extra flavor and moisture didn't hurt! You could leave out the sweet potato of course.

I use half a loaf of french bread (bonus if it's homemade and a little dry)
Here's what I use to dip the bread slices in:
3 eggs
about 1/4 cup half and half
a big spoonful of mashed sweet potato
1/2 tsp cinnamon
1/2 tsp pure vanilla extract (I've found that imitation just isn't the same)


I find that turning the slices in your egg mixture two or three times is just right.
Fry those slices in lots of butter please! If you have an iron skillet to use, you should.


I'm sure I don't need to tell you to sprinkle with powdered sugar and drizzle with maple syrup.
If your household is anything like mine, you better eat before it's all gone!

Friday, October 1, 2010

The Happy Return


Two dozen pumpkin chocolate chip muffins.

Tea time just got a little cheerier.

Happy Baking to all of you celebrating the return of canned pumpkin in stores. It's been a long wait!

Friday, July 23, 2010

The Family Biscuit Recipe


Here's an easy recipe that my mom and her mom made. When I got married, I copied it into the back of a cookbook I got as a shower gift. These biscuits are great with gravy and a good vehicle for jam. You can also use this as a basic recipe for cheese biscuits or cinnamon-raisin. I'm sure there are lots of great recipes out there for biscuits. However, these are different because, they have three ingredients people. You can't get any easier than that.
Biscuits require a light touch. Too much mixing or kneading and they will be dreadful.
It took me a few tries with these when I was new to cooking to get them right.
Here goes...


2 cups self-rising flour (If you've never used this, it's great for pancakes too.)
1-1 1/4 cups buttermilk (or milk, but buttermilk makes them richer, I think)
1/4 cup vegetable oil


Just mix with a fork until it holds together. Don't overmix. If it looks dry, add a little more buttermilk. If it's too wet, you can knead a little flour into the dough on your counter.
Roll out on floured surface, careful not to roll them too thin. I use a glass to cut them out. Place on nicely oiled pan. I always use a little of the buttermilk left in the measuring cup to rub on the tops.
Bake at 450 degrees in the center of your oven until golden brown. Times will vary based on how thick you cut them.


Notice the little tiny biscuit. My mom always baked the bit of dough that was left after rolling out the biscuits. When I was little we called that the "baby biscuit". I always got it because I was the youngest. Funny how you carry on silly traditions like that.
This recipe can easily be doubled, or tripled. Enjoy!

Monday, June 21, 2010

My So-Called Food Snobbery Explained


I've mentioned before that my husband thinks I'm a food snob. There's been a running joke here lately about his comment to me that it's okay if I make "regular food". So am I a food snob? Here's the deal. My mother was and is an excellent cook. If she didn't get my lunch packed before school, she would bring me something homemade at lunchtime. I was the envy of all my friends. When I got home from school, many times there were pepperoni rolls or cookies waiting. She made most everything from scratch and that made a huge impact on me. When I got married I was disturbed to find out that my husband would really secretly rather have the brightly colored macaroni and cheese from a box than mine. The nerve. We dated four years before we got married and I never knew this.


He has since come around to my way of thinking. Although last year I made a pizza with goat cheese on it and he said it tasted like armpit. Honestly though, I wasn't crazy about the goat cheese either. Mozzarella is just fine, but (here's where the snobbery comes in) fresh mozzarella is just much better. I asked him the other day if he wanted anything at the store and he asked for graham crackers and the "crappy" peanut butter, he so affectionately calls it. "Crappy" means the unnatural kind. Hey, I wouldn't change him a bit. Being different is what keeps things interesting.

So, yeah, I have some smug tendencies toward food. It can get you into trouble. A while back at our Bible study, I nearly caused my friend JenaRae's throat to close up when I brought tea that appeared to be simply tea but it was tea with chai. "Shoot, I forgot you were allergic to cinnamon!" Sorry Jena!


Lest you never want to have me over for dinner, let me just say the following: I do enjoy the perks of a cake mix. Velveeta (if you want to make queso late at night after the kids are in bed) is valuable. I make beans and cornbread; sometimes we have pancakes for dinner. Sometimes it's more important who you're cooking for than what is actually on the table. Okay, it's always more important who you're cooking for. I genuinely appreciate any and every effort in the kitchen, especially when done out of love for your family. So keep it up ladies (or gents), whatever your style of cooking may be! You will not be judged.


Happy Cooking!