Wednesday, December 14, 2011

More Gingerbread House Decorating Party Tips!


Are you thinking of hosting a gingerbread house decorating party? I must say that, with the help of all my friends, I have this tradition almost down to a science. I was keeping a mental note of what we were finding out this time around, and maybe someone can benefit from said findings? And be sure to check out last year's tips on how to have a sweet party!

I'm not even sure how many years we have done this, I'm thinking five or six? We continue to learn, of course, as our children get older and we add more little ones into the mix. We just had our annual party last weekend, and we had a record amount of kiddies decorating. I think we had sixteen houses. We even had two little guys, one two years old and the other nearly two, decorating their own tiny custom houses. It was magic!

Tip number one: use hot glue!
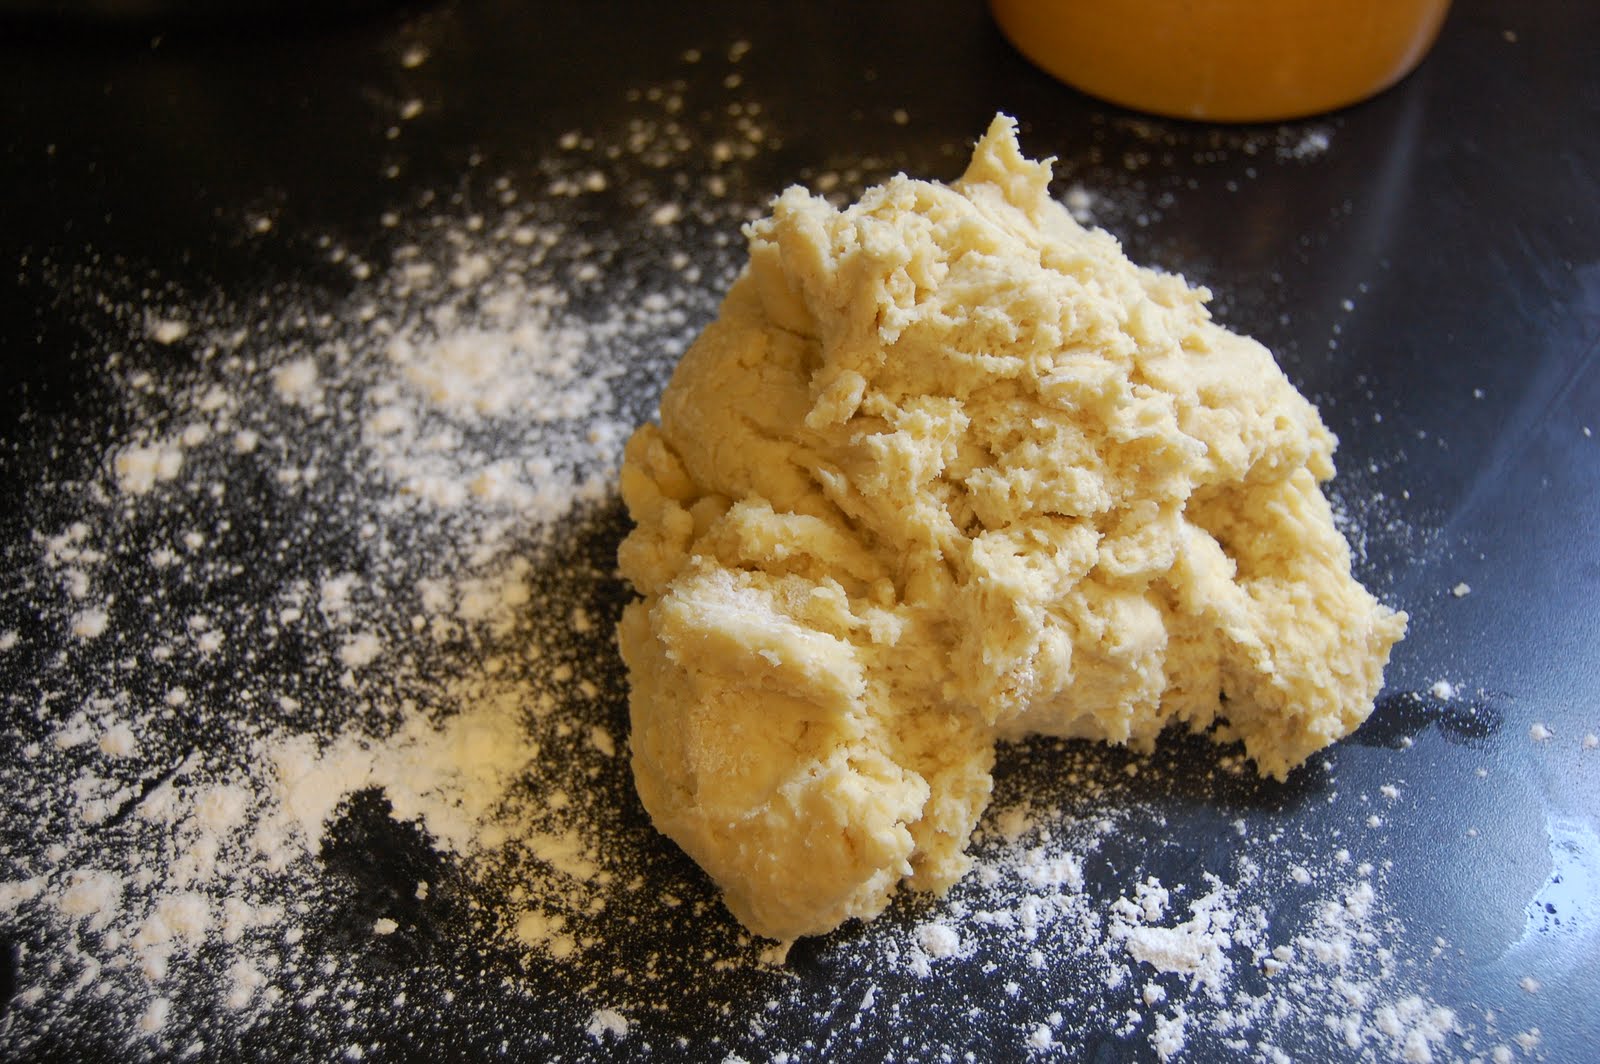
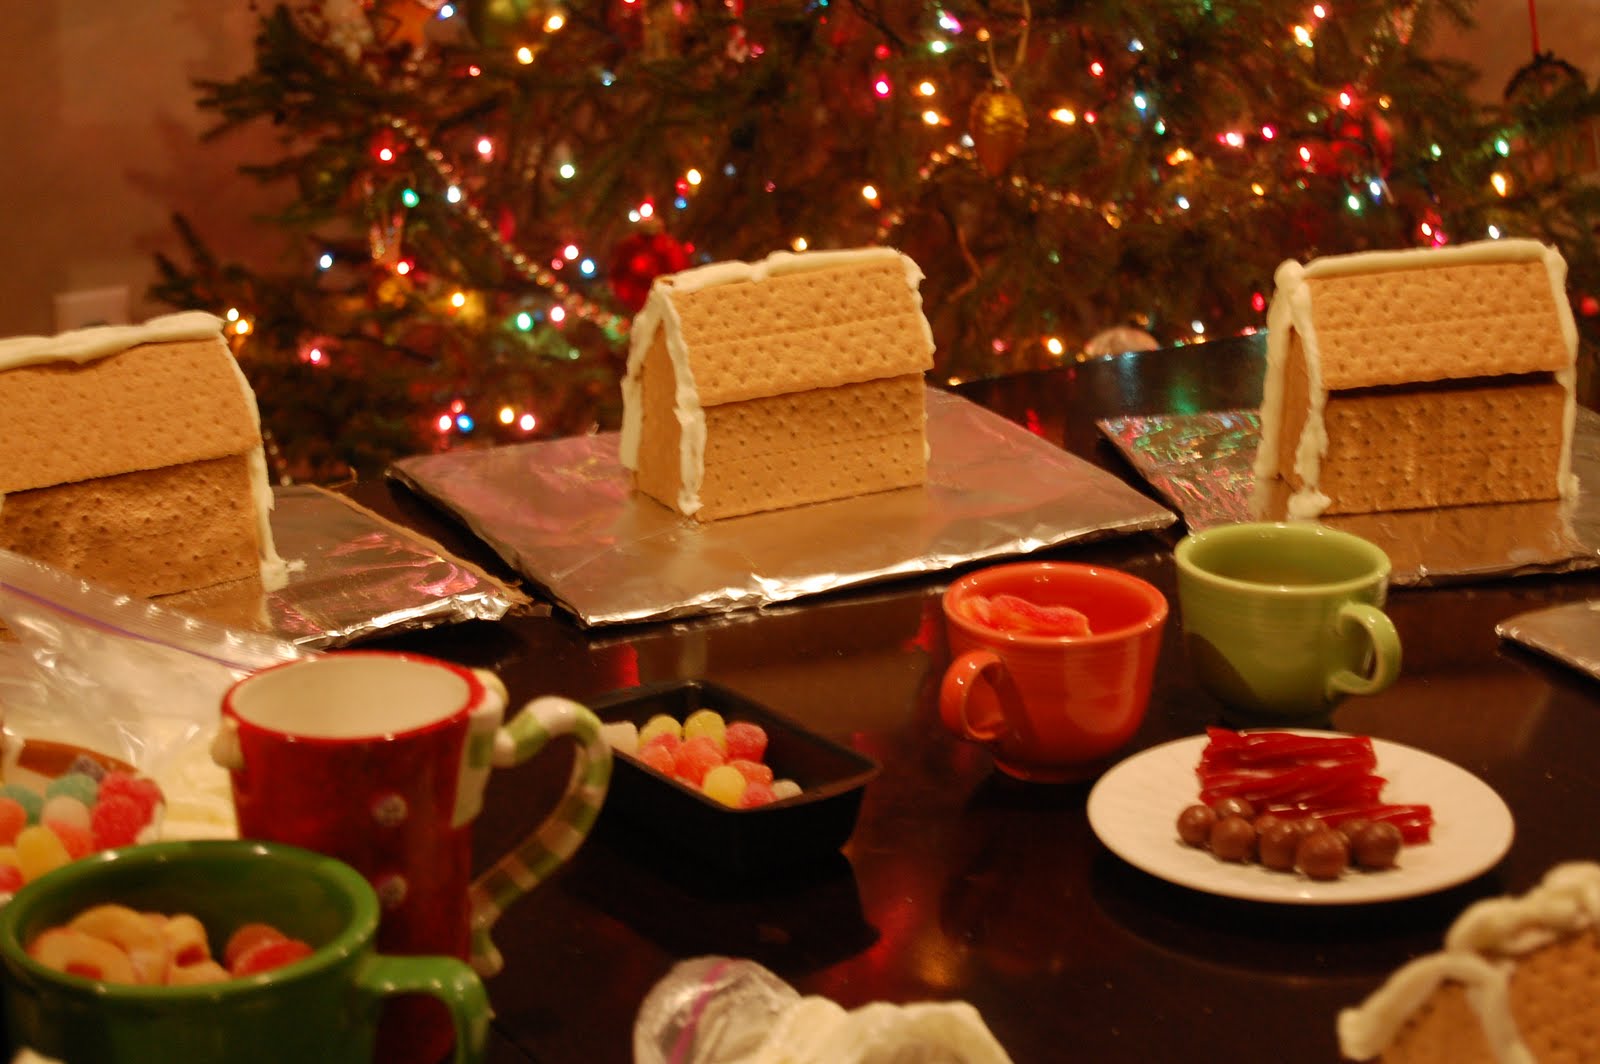
Last year we decided to use graham crackers to make the houses, which worked fine, once we figured out the best way to make them. This year we used hot glue to stick the houses together, instead of icing, because no one really eats the house part anyway! This worked much better, they dried faster and stronger. We did pipe around the joints with icing, just to seal things up and make them look better. This also helps disguise any wonky-ness you may have!

Tip number two: let your husbands do some building (it is really good for some laughs!)
As a few of us sat making the houses, while other ladies were busy with other jobs, we kept saying again and again that we thought our husbands would enjoy the task of building. So, we put them to work! Seeing our fellas wielding glue guns was pretty cute. The guys had a blast, and the ladies had time for other things.

Tip number three: pay attention to what sizes of crackers you have
One thing we discovered early on, was that some brands of crackers were different sizes. That meant we had to be sure that the pieces of each house had the same brand. Also, one brand had crackers that weren't in sheets, they were in squares, which is almost a deal breaker. The good thing is that, when you are using the glue, it is very easy to just glue pieces like that together to make a sheet. When you are setting up to build, just put like brands together.

Tip number four: Use thicker icing for sticking candy
I remembered last year thinking that I needed to make the icing a little on the thick side. Why? Because heat from little hands quickly warms up the bags of icing and makes the icing a little on the runny side. Of course, if you are using ready made icing, you could put the icing bags in the fridge, just for a bit, until ready to use. This would keep them from becoming runny as quick. No one wants their candy sliding off the house!

Tip number five: big tootsie rolls make great chimneys!

A big element of this party is the candy. Our faves are gumdrops, sticks of gum, and those gummi rings make great wreaths. Someone brought sno caps, which I really enjoyed eating. One thing we found this time around was that big tootsie rolls make great chimneys. I had some (okay tons!) of Halloween candy leftover, and there were lots of those in my stash.

Tip number six: corral the candy with cupcake liners!

As we were watching our darling children stick candy to their houses, one of my mommy friends observed that we needed cupcake liners for each kid to house their candy. Some of the round candy was rolling away onto the floor. So, I grabbed some out of the cabinet, and problem solved! Seriously, what would I do without the wisdom of other moms?


This Christmas season, I have really tried to slow down, and do less. But this party is one thing I just can't seem to skip. When the kids start decorating, and everyone is having fun, I always look at my husband and smile. I LOVE hosting this event! I know these parties will be something we will always remember.

Wednesday, November 23, 2011

A Grateful People

Have we waited far too long to surrender
Forgive us Oh God the years
We failed to seek your face
Oh Lord, your mercy turns us into
Grateful people
We can’t seem to find the words
So take our lives that there might be enough
To tell you how grateful
Lord, we are grateful

from "A Grateful People" by Watermark

The words of that song always come to my mind this time of year. It seems easy to remember to be thankful for the little things. My oldest daughter wrote that she was thankful for clean water, and our doctor. My two year old is thankful for cookies. We do tend to take the simple things for granted. A not so simple thing that I am guilty of forgetting is the mercy of a holy God. What I deserve and what He has given me are two very different things. So thankful.

Wishing you and yours a lovely Thanksgiving. And remember friends, a slice of pumpkin pie counts as a serving of vegetables!

Monday, November 7, 2011

Remembering to Be Thankful


With Thanksgiving upon us, we are trying to be more intentional about the way we celebrate the holiday. There are lots of ideas on how to get your kids thinking about thankfulness, and good ones too. This year I decided to just cut strips of paper that we can write our thoughts of thankfulness on. The strips will go into a jar, and then we can pull strips out to share at dinner each night.


I thought that after Thanksgiving, we can make the strips into paper chains. I always like to do paper chains for our Christmas decor, and this way, the cutting paper part is already done, and we can go on thinking about our thankfulness throughout the Christmas season.


This is just a simple way to turn our hearts towards being grateful.

Friday, October 21, 2011

Cream Cheese Pastry with Crumbly Topping


If you are looking for something healthy to cook, move right along. This recipe is not for you. It is, however, so very delicious. It is another winner that my mom cooked up, years ago. Remember the Easy Pastry Braid? The same dough is used to make this recipe, and it is easy! This dough is so easy to work with, and always turns out right.

Ready? Here goes...


Make your dough, and refrigerate for an hour. I have even mixed it up before bed and left it to refrigerate until morning. I'm telling you, I have never had any trouble with this dough recipe.


Spray a 11 x 9 pan with cooking spray and set aside. Then pinch off about 1/3 of your dough and set that portion aside. With the rest of your dough, roll it into a rough rectangle and place in the pan. Then just press it around until you fill the pan. Press the dough up the edges of the pan as well. Now you have a place to pour your filling.

Mix your filling! In a mixing bowl, beat eight ounces cream cheese, one egg, and 1/4 cup sugar until smooth. Pour this on top of your dough. Set that aside.

Now, take that bit of dough we pinched off, and roll it into a smallish rectangle. Cut strips of dough out, and lay them on top of your filling. We are going for a rustic look here, it doesn't need to be fancy. Every one will be too busy eating it to care what it looks like anyway! Now set that aside in a warm place to rest while you make the topping.


For the topping, mix one cup flour, one cup sugar, and one stick of butter with a pastry blender. I usually start out with a pastry blender and finish with my fingers. You can just use a fork if you don't have a pastry blender. Just mix it all up till it's crumbly. Make sure you leave some big pieces. Dump that deliciousness on top of your pastry!


Bake at 350 degrees for about 20 minutes, or until it's golden brown.


I think you are going to love this one!

Friday, August 26, 2011

Look at the beautiful flower I grew! (not so much)


Lovely, isn't it? Yes, but you should know, this beauty came about because I spilled a bag of bird seed on a graveled spot in front of our house.

It's funny to me that this came up by accident, but my garden that I spent lots of time and money on did not do so well. Proof, if you ask me, that I should stick to sewing and cooking!

Friday, August 19, 2011

Getting Some Perspective...Once Again.

Losing sight of the goal in parenting can really make you feel despair. I had a day last week where I forgot what my objective was. It seemed all day I was quietly labeling my children as rotten, because there had been so much disobedience. I complained to my husband about them when he got home. Then when all were in bed and one little straggler was resisting sleep, I'd had enough. Rotten, rotten, rotten. I escaped to my bedroom where God graciously brought my thoughts back to where they needed to be. Suddenly it hit me. Why did I want my children to obey? I realized that I was focusing on obedience for convenience sake. When they obey, it makes things easier on me. When they don't deliver, then they are bad and I must be a failure for not getting through to them. And then, there at the very bottom, the only thing left for me to do is demand justice. Someone must pay, whether it is the kids for their mistakes, or me for mine.


It was so humbling for me to come to this realization. What am I hoping to raise? Children who are sinners yet see their need for a Savior? Or little people-pleasers who are self-righteously obeying authority for appearance sake? I want a heart change in my children. Disobedience is a window into what is going on in my children's hearts. It is an opportunity to teach them truth.


When my perspective had changed, I was able to see that I had not been trusting God for my children's lives. Right now, day after day of the same struggles, it is easy to feel like I am not making any progress. However, God is at work, and He will put my feeble attempts to good use. I had forgotten that His strength is made perfect in my weakness. Believing that He will equip me to train my children helps keep my perspective right where it should be.

Tuesday, August 9, 2011

Making Jam


This morning I came across this recipe, and I am going to try it as soon as I find a good deal on plums. I love making homemade jam. There's something about those sparkly jars in my cabinet filled with something I made. I made my first batch of jam last year using blackberries from our yard. Since then I've made peach, strawberry, and blueberry. The more I have done it the more confident I have become. Making jam isn't nearly as intimidating to me as canning other things, because you use the water bath method. You can buy special equipment for this, but I just use my stockpot with a rag on the bottom instead of a rack. Besides your jars and lids, the only other equipment you need is a utensil set. This is the one I have.

This site is where I started reading up on canning, and it had lots of helpful tips. I read and re-read about making jam before making my first batch, and then I just followed the directions on the pectin package. I've used Sure-Jell for less sugar recipes, and this one. These allow you to make jam with a lot less sugar, or even with honey.

I hope these links and tips will be helpful if you've never tried making jam before. It really is so much fun, and sweet little jars of jam make great gifts!

Friday, July 29, 2011

Watermelon Slushies


I always find us out of fun drinks on days when the kids are out in the sun, not a good thing. We have had some dreadfully hot days here lately, and I needed a cold drink for my four little ones. So I made slushies! It is amazing what a blender can do.


This is really a non-recipe, and this whole post is serving to fill in the gap until I have something brilliant to share, if I'm being honest. Maybe this will just spark some creativity in the kitchen? I felt this drink wasn't really sweet enough for my grown-up taste, but my kids loved it. My daughter asked me if I made this up myself, and when I answered yes, she seemed impressed. So I guess you can't go wrong if something you try in the kitchen charms your kids.


I simply blended about two cups chopped watermelon, a cup of ice, about a 1/4 cup apple juice, and the juice of two lemons. I tasted and added until I got the consistency I wanted. Sorry about the lack of concrete measurements; told you it was a non-recipe.

I really think some limeade in place of the apple juice might make this fabulous. And I'm certain some really sweet lemonade would do the trick. So you try it and tell me what you come up with, and I will just benefit from your creativity! How's that?

Monday, July 25, 2011

Why am I blogging about rice krispie treats?

Because these were just so good. Boasting browned butter (a lot of it) and coarse salt, these are not your grandma's rice krispie treats! I don't have a picture to show you because we ate them all up at Bible study the other night, and I've been a pretty lazy blogger lately. I doubled the recipe and put them in a 11x13 dish, and got lovely towering treats.

I've been labeled a food snob, and these treats are definitely food snobbery at it's best. For me, food snobbery is about taking simple ingredients and pairing them with something unexpected. It's not about fussy, hard to find ingredients or difficult cooking methods.

Hopefully soon I will be back to regular blogging. We are just really trying to pack in plenty of summer fun in between laundry/cooking/naps while we still can! Hope you are enjoying your summer.

Friday, June 24, 2011

Remembering What Makes a Good Day

This week I've found myself very far behind in the laundry and housework. Home projects and time in the garden have taken priority.
Having so many little ones sometimes means waiting until nap time to even try to do housework.


I had a few moments of desperation this morning, but as the afternoon wore on, I began to think about what I had accomplished.


I made play-dough, read two stories to the babies, and marveled at a sleeping kitty in the doll stroller. You would think that with as many kids as I have I would understand what qualifies as a good day, but I am still trying to learn that one.

A successful day lies in being available to the little ones, not how many things I checked off my list. People are more important than things.

Thursday, June 16, 2011

Making Summer Memories


My newest challenge is making time to make summer memories and traditions with my kids while still having some focused learning (and you know, clean, cook, fetch the baby who has escaped out the door...again). I'm going to try to continue in a bit of our studies, maybe changing things up a bit...a unit study on space, weather journals, and my daughter wants to master cursive writing.

My friend Gina's post about summer got me to thinking about making a summer list. We are still working on it, but it has been a fun topic of conversation. We are excited about going to the farmer's market to sell eggs, our weekly pool date with friends, and staying up a little later to catch lightning bugs.


Like all kids, mine love water fun! I recently got out the water balloons. We had a blast with them, but then I remembered these sponge balls. These would be better than water balloons for little ones. So many of the water balloons we spent time filling just bounced off of little bodies and rolled away.

I will share with you a little tradition we have as a family. Occasionally, when everyone's tired but we just need a little relaxing time together, we go out for a little drive. Sometimes we stop at Starbucks first, and we just play music and talk. The last time we did this, we added a twist to it. We quickly came up with a list of things to look for, just easy things- a yellow car, two people walking, a yard with a swimming pool. Some were easy to find, and others (a three-legged dog) were just silly and nearly impossible. We just had the best time that evening.

Well, I feel like summer is slipping away too quickly already! I've always been an occasional blogger, and I don't see that changing anytime soon. There is just too much fun to be had right now!

Tuesday, June 7, 2011

Techy Bling

My husband came home from work awhile back and showed me an unwanted processor he planned to make into a key chain. I saw the potential as well in that little gadget and asked him if he could get me one too.


It was sparkly and pretty and unique. I thought it would make a really interesting necklace. My man put the hole in it and added a ring.


Also, it's kind of a nod to my computer whiz hubby!

Tuesday, May 31, 2011

Maggie's Tea Party


My little Maggie is a lover of beauty. She can find beauty in most anything, and gushes over the simplest things, saying "that's so pretty" or "that's so nice". So for her birthday party, the emphasis was on beauty. She wanted a dress-up party, so I set out a stack of fancy hats and a box of dress-ups.
On the menu was raspberry tea, lemonade, and an assortment of treats, including popcorn and pretzels. I made lemon bars, and this recipe was fantastic. So, so good. For the birthday cake, I made cake cones and used twinkie filling for the icing.

I made paper pom-poms; fun, easy, and they were so pretty.


Everything turned out lovely, and Maggie was pleased.

Saturday, May 28, 2011

Ta-da! Girls' Room Before and Afters Part Two

I can finally show you our girls' room! We really wrapped up this project quickly, but I had just a couple things left that I needed my husband's help with. My vision for this room was inspired by my oldest daughter's love for horses. I didn't want a manufactured horse-themed room, however. I was hoping to achieve a sweet room that would make you think of riding horses in a meadow. The colors were inspired by the quilt (used on the top bunk) that my husband found in some of his old stuff: pale green, yellow, and touches of red.

In case you missed it, here is the before.

After!


For the curtains, I used a king size sheet cut down the center to make two panels. Years ago, I spotted some curtains in the Pottery Barn Kids catalog trimmed in ric-rac. I always wanted to copy the design, and I really like the way these turned out. The ric-rac is red, yellow, and pale blue. The beauty of making your own curtains is you can get a grand look for not a lot of money. These curtains are ultra long and full.


The desk was a sewing cabinet collecting dust in the garage. It was cheap brown wood with outdated knobs. New paint, new knobs, new look! It has lots of drawer space for art supplies. The chair is a favorite of mine from long ago.


Instead of spelling the girls' names out on the wall like we did in the old room, I just used their first initial tied onto each girls' bed. There's a touch of red in the ribbons.


The lantern above the top bunk was in the old room, paired with a pink one. My husband changed the switch on it, moving it from the bottom of the cord closer to the top. Then we swapped out the bulb for a 15 watt one. Now she uses it as a reading light, and it's not so bright that it will wake baby sister below! Cool, huh?


Here's a pic of the lantern after I finished the sleeve for the cord. Also something I saw in Pottery Barn.


Fun banner made from wool and fabric scraps. It's hung with twine and 70 cent knobs from Hobby Lobby.
The peg hanger was in the old room, and was painted white. There's the red I wanted.


Fabric swatches in embroidery hoops. The toile fabric has horses in it.

We love this room! I love that I was able to use so much of what we already had on hand. And, I am now a believer in bunk beds. I didn't think I liked them so much before, but they sure free up lots of floor space! So glad to have this project done.

Sunday, May 22, 2011

Lovey Dovey Embroidery


I made my husband one of these for his office as a Valentine's Day gift. I can tell you he was rather charmed. It was so cute, and I had been itching to do one for our home.

Wouldn't this make an adorable wedding or anniversary gift for a couple?

Friday, May 13, 2011

Spring Love

Every spring I say spring is my favorite season. Then fall comes and I say fall is my favorite season. So glad I don't have to choose.


It may sound corny, but I can't stop marveling at the dogwood blossoms or the smell of the lilacs on the breeze.